
Part of my ongoing ‘Directing your own online classes’ series. All articles can be found on this page.
Intro
Due to Corona, I am forced to teach from home (lockdown in Belgium). Until now, this meant recording my main screen in our university college streaming application and that’s that (we use Panopto, a tool that combines your mainscreen, camera and powerpointslides and allows the student to choose what stream to focus on).
There’s two major drawbacks to this:
- It’s not easy to elegantly switch between programs while teaching.
- You can’t really create a nice looking overview of several programs in parallel on screen/ After a few minutes my screen is cluttered with open programs everywhere.
- You can’t also add live sketches etc.
- You can’t “hide” parts of your screen, or prepare a program before students see it (unless you use an extra screen)
Basically, I’d like to be a director that has total control over what the student is going to see. The OBS Project allows me to be that director, but I had no clue how I could integrate my OBS output into Panoptop, Teams, Skype or any other tool I use to communicate with my students.
Again, Scott Hanselman brougth the solution. The missing link: create a virtual NDI camera and use OBS Studio as main tool. Hooray for Scott.
Here’s the result (halfway I sketch on another laptop):
Let’s break down how I did this.
Here’s a summary of what the NDI virtual input does: “This is a very useful application that allows you to make a designated NDI source available locally as a proxy ‘webcam.” [source] The NDI sources ‘talk IP’, creating the additional benefit that your virtual camera’s can come from anywhere on your network!
Setup
The high-level flow and setup is as follows:

I sketch on a separate Microsoft Surface using the Microsoft Whiteboard app that is free on Windows 10. This stream is send, using NDI and OBS, to my main pc (production) where I record my lectures using Powerpoint slides, Visual Studio and any other program I need. On this production PC I combine the remote NDI stream from my Surface, together with any other things I am showing, again using OBS. Thanks to OBS I can setup my screen anyway I like:
This stream is then or recorded , or streamed to any NDI-compliant application such as Skype, Teams or Panopto. Or if I want, I can also simply stream directly to youtube, twitch, etc.
Sketch pc
This one was solved the latest, but is actually quiet simple.
- Install NDI Tools for windows. Make sure you select the “NDI Input” component.
- Install OBS Project
- Install the OBS-NDI integration tool
- Start the “NDI Virtual Input” service (through Start). This should show an icon in your tasktray
- Open OBS:
- Go to tools NDI Output Setting and enable the main output. Give it a good name. This will be the name of the NDI stream that will be send to my production pc.
- Create a scene and capture your sketch-application
That’s all! You don’t have to click “start stream” or “start recording”. As long as the NDI Virtual Input service is active, your current (active) OBS scene will be transmitted to anyone in your network that needs it.

Production PC
This one is basically the exact same steps as the sketch pc (obs+ndi)
However, you now can acquire the sketch NDI stream now as an extra source in your OBS. Simply add as source a new “NDI External source” and if all goes well , you should see your Sketch PC here:

You can now use this source as any other source and create a more sexy stream as you can see at the start of this post, including your webcam, slides, etc.
Getting it to Teams, Skype, Panopto
Finally, you now need to get your beautifully crafted scenes to your student. Because you’re in OBS you could simply stream it to Twitch, etc. But what if you want to do a Q&A in a teams meeting, have a skype call with some students? Well the solution is again NDI: most programs nowadays allow NDI streams as an alternative to your webcam.
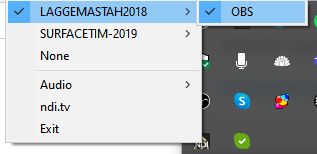
First: start the NDI virtual Input service. Now right-click the NDI icon in your tray AND SELECT THE OBS STREAM you created on the production pc (by the way, you could even select the sketch pc ndi stream here: choose whatever stream you’d like to view your students)
Last but not least, open your favourite remote conference/teaching tool and pray that it allows a NDI stream as your first camera. I can confirm that Teams, Skype (make sure to use “Skype for Windows”, not the Win 10 app!) and Panopto have this!
Here we see how it works in Skype
Here in a Teams meeting:

And here in a recorded Panopto:
And now?
In the next part (will be published on 26/3) I will explain how I now actually direct by rapidly switching between scenes and content using shortcuts, a device or an app.
(update) Be sure to check out this excellent tutorial how to do all the things I’m doing as well, but written way more structured 😉
I have a Mac
Well, as you’ve might have guessed, this blog was fully from a Windows-perspective. Someone linked me to the following OBS project fork which might solve this problem if you own a Mac and need a virtual cam setup:

Hi Tim, I’ve been trying to get the virtual webcam going on Mac … I’m on OSX Catalina, and from what I have read now creating virtual webcams from an OBS source got broken in the latest OSX update. It used to work with Syphon to port the video stream between applications, but that seems to be borked. Should you hear of other OSX users who manage to get it working, I’d be happy to learn the setup!
LikeLike
Hope a fellow macophile can help you. Me…I can’t, sorry 🙂
LikeLike
Check this out Dries: https://github.com/johnboiles/obs-mac-virtualcam/releases/tag/v1.0.0
LikeLike
Wow nice, thanks for getting back on this! I stopped searching somewhere mid-corona … I learned last week my phd defense might be virtual (planned in october, but still). So I was already dreaming of an upgraded setup by then! 😉
LikeLike