
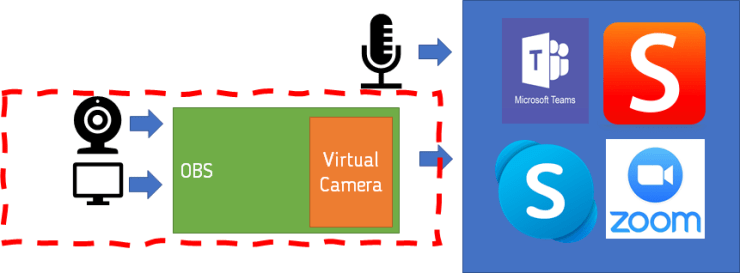
Step 1 in reachting the ultimate online teaching setup will be installing OBS. Since several months OBS has virtual camera capabilities built-in, resulting in an extremely simple setup.
Steps to do:
- Install OBS from https://obsproject.com/ and start it
- Learn how to setup scenes and sources (good tutorial here) . For example, click the + button under sources and choose Video Capture and choose your webcam. Voila, you are nog part of the currently selected scene
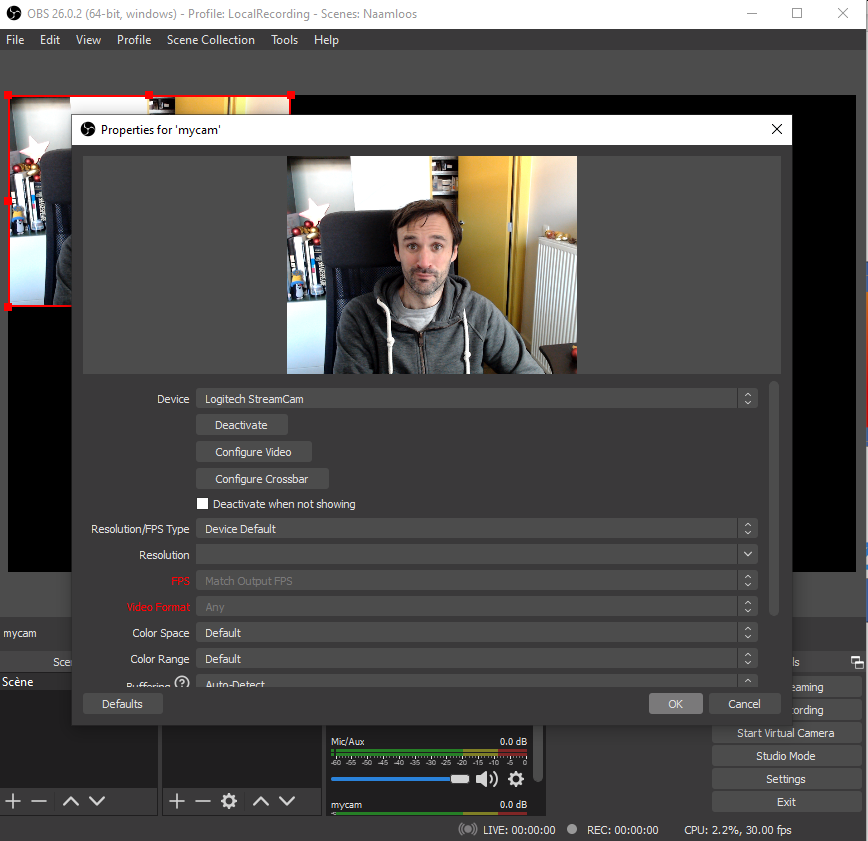
- Click this nifty button in OBS :

- Open your streaming software. (I’ll demonstrate it in Teams). Go to the settings of your streaming sofware and select the “OBS Virtual Camera” as your camera to use

- And you’re done! Everything you now do in OBS (setting up scenes, switching between them, etc) will automagically show on your streaming camera. (Here are some ideas what you can do with OBS)
In the next part I’ll show to remove your background and add yourself in front of your powerpoint presentation (or whatever you are doing)

1 gedachte over “Remote teaching in 2021 – Part 2 (Virtual Camera with OBS)”